You’ve spent all day perfecting your latest holiday email marketing campaign. The copy is perfect, the subject line irresistible. Now all that’s left is waking up at 4 AM to send it so that your subscribers across the country see it first thing in the morning. Wait, what?
Of course you don’t want to wake up early just to send an email. With Direct Mail, you don’t have to!
Scheduling your campaigns
You can schedule your campaign to send at any date and time, even if Direct Mail is closed or your computer is turned off when that time arrives. Here’s how:
Click the send button in the toolbar
Click the “Schedule” popup menu and select “Schedule for Later”
Choose the date and time you want your campaign sent
Click the Send button
After you click Send, Direct Mail will queue up your campaign to send at the time you specified. If you switch over to the Report tab, you’ll see your campaign waiting to send.
FAQ
What if I change my mind and want to cancel or reschedule?
No problem. In the Reports tab, just click the “Cancel Delivery” or “Reschedule Delivery” buttons.
What if someone subscribes to or unsubscribes from my mailing list before the campaign is sent?
If someone unsubscribes in between the time that you queue up the campaign and the delivery date, Direct Mail will automatically skip them when the campaign is sent.
If someone new subscribes to your list in between the time that you queue up the campaign and the delivery date, they will not receive the campaign (but will still be added to your list for the next campaign). For this reason, it’s best to not schedule campaigns too far in advance, especially if you are expecting a bunch of new subscribers.
Putting together an email campaign is often more than just a one-person job. The responsibilities of writing content, creating graphics, editing, analyzing reports, and more may be shared across an entire team of people. In these situations, Direct Mail’s cloud sharing features can really come in handy. In this blog post, we’ll show you how easy it is to share your Direct Mail project with other people.
Step 1 of 1
To share your Direct Mail project with other people, all you need to do is choose “File > Share…” from the menu bar at the top of your screen.
If you haven’t already, you’ll be prompted to first move your project into the Direct Mail Cloud. This is a necessary step because project sharing is built on top of Direct Mail’s cloud features.
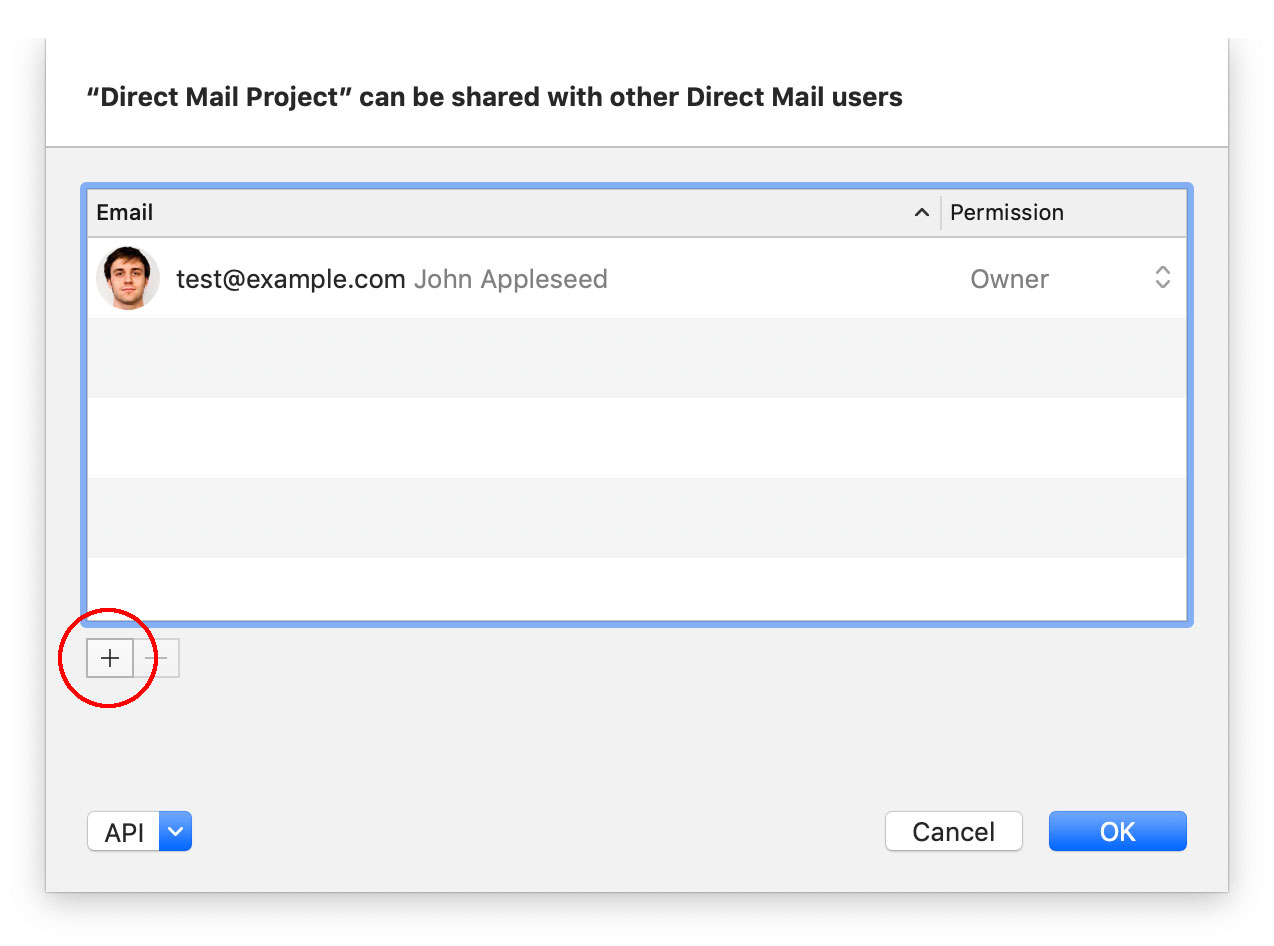
After you choose “File > Share…” from the menu bar, you’ll see a list of people that are allowed to access your project.
To allow new people to access your project, click the “+” button and enter their email address. After you’ve entered their email address, pick what level of access (i.e. permission) you’d like to give them:
View: The person can view, but not edit your project
Edit: The person can view and edit your project
Edit & Send: The person can view and edit your project, and can send email campaigns from the project
Owner: The person can do all of the above, plus edit these sharing settings or remove the project from the cloud. Email campaigns sent from this project are billed to the owner’s Direct Mail pricing plan.
When you’re all done, click OK.
What happens next?
A notification email will be sent to the people that you added to your sharing list. The notification email tells them how they can open the project that you’ve shared with them. If the person doesn’t yet have Direct Mail installed on their Mac, the email will tell them how they can download and set up a free account.
If someone has shared their Direct Mail project with you, you can open it by choosing “File > Open from Cloud…” from the menu bar at the top of your screen.
Live editing
As you (or the other people you’ve shared with) make changes to your project, Direct Mail automatically keeps everyone up-to-date. Changes are synced across the Internet in real time. If two people change the same piece of data (e.g. a message, an address, etc.), the most recent change wins.
Change your mind?
You can change who has access to your project at any time. To do so, just choose “File > Share…” from the menu bar again. You can remove people from your project, change permission levels, or add new people. If you remove someone from the list, then Direct Mail will automatically remove your project from their computer.
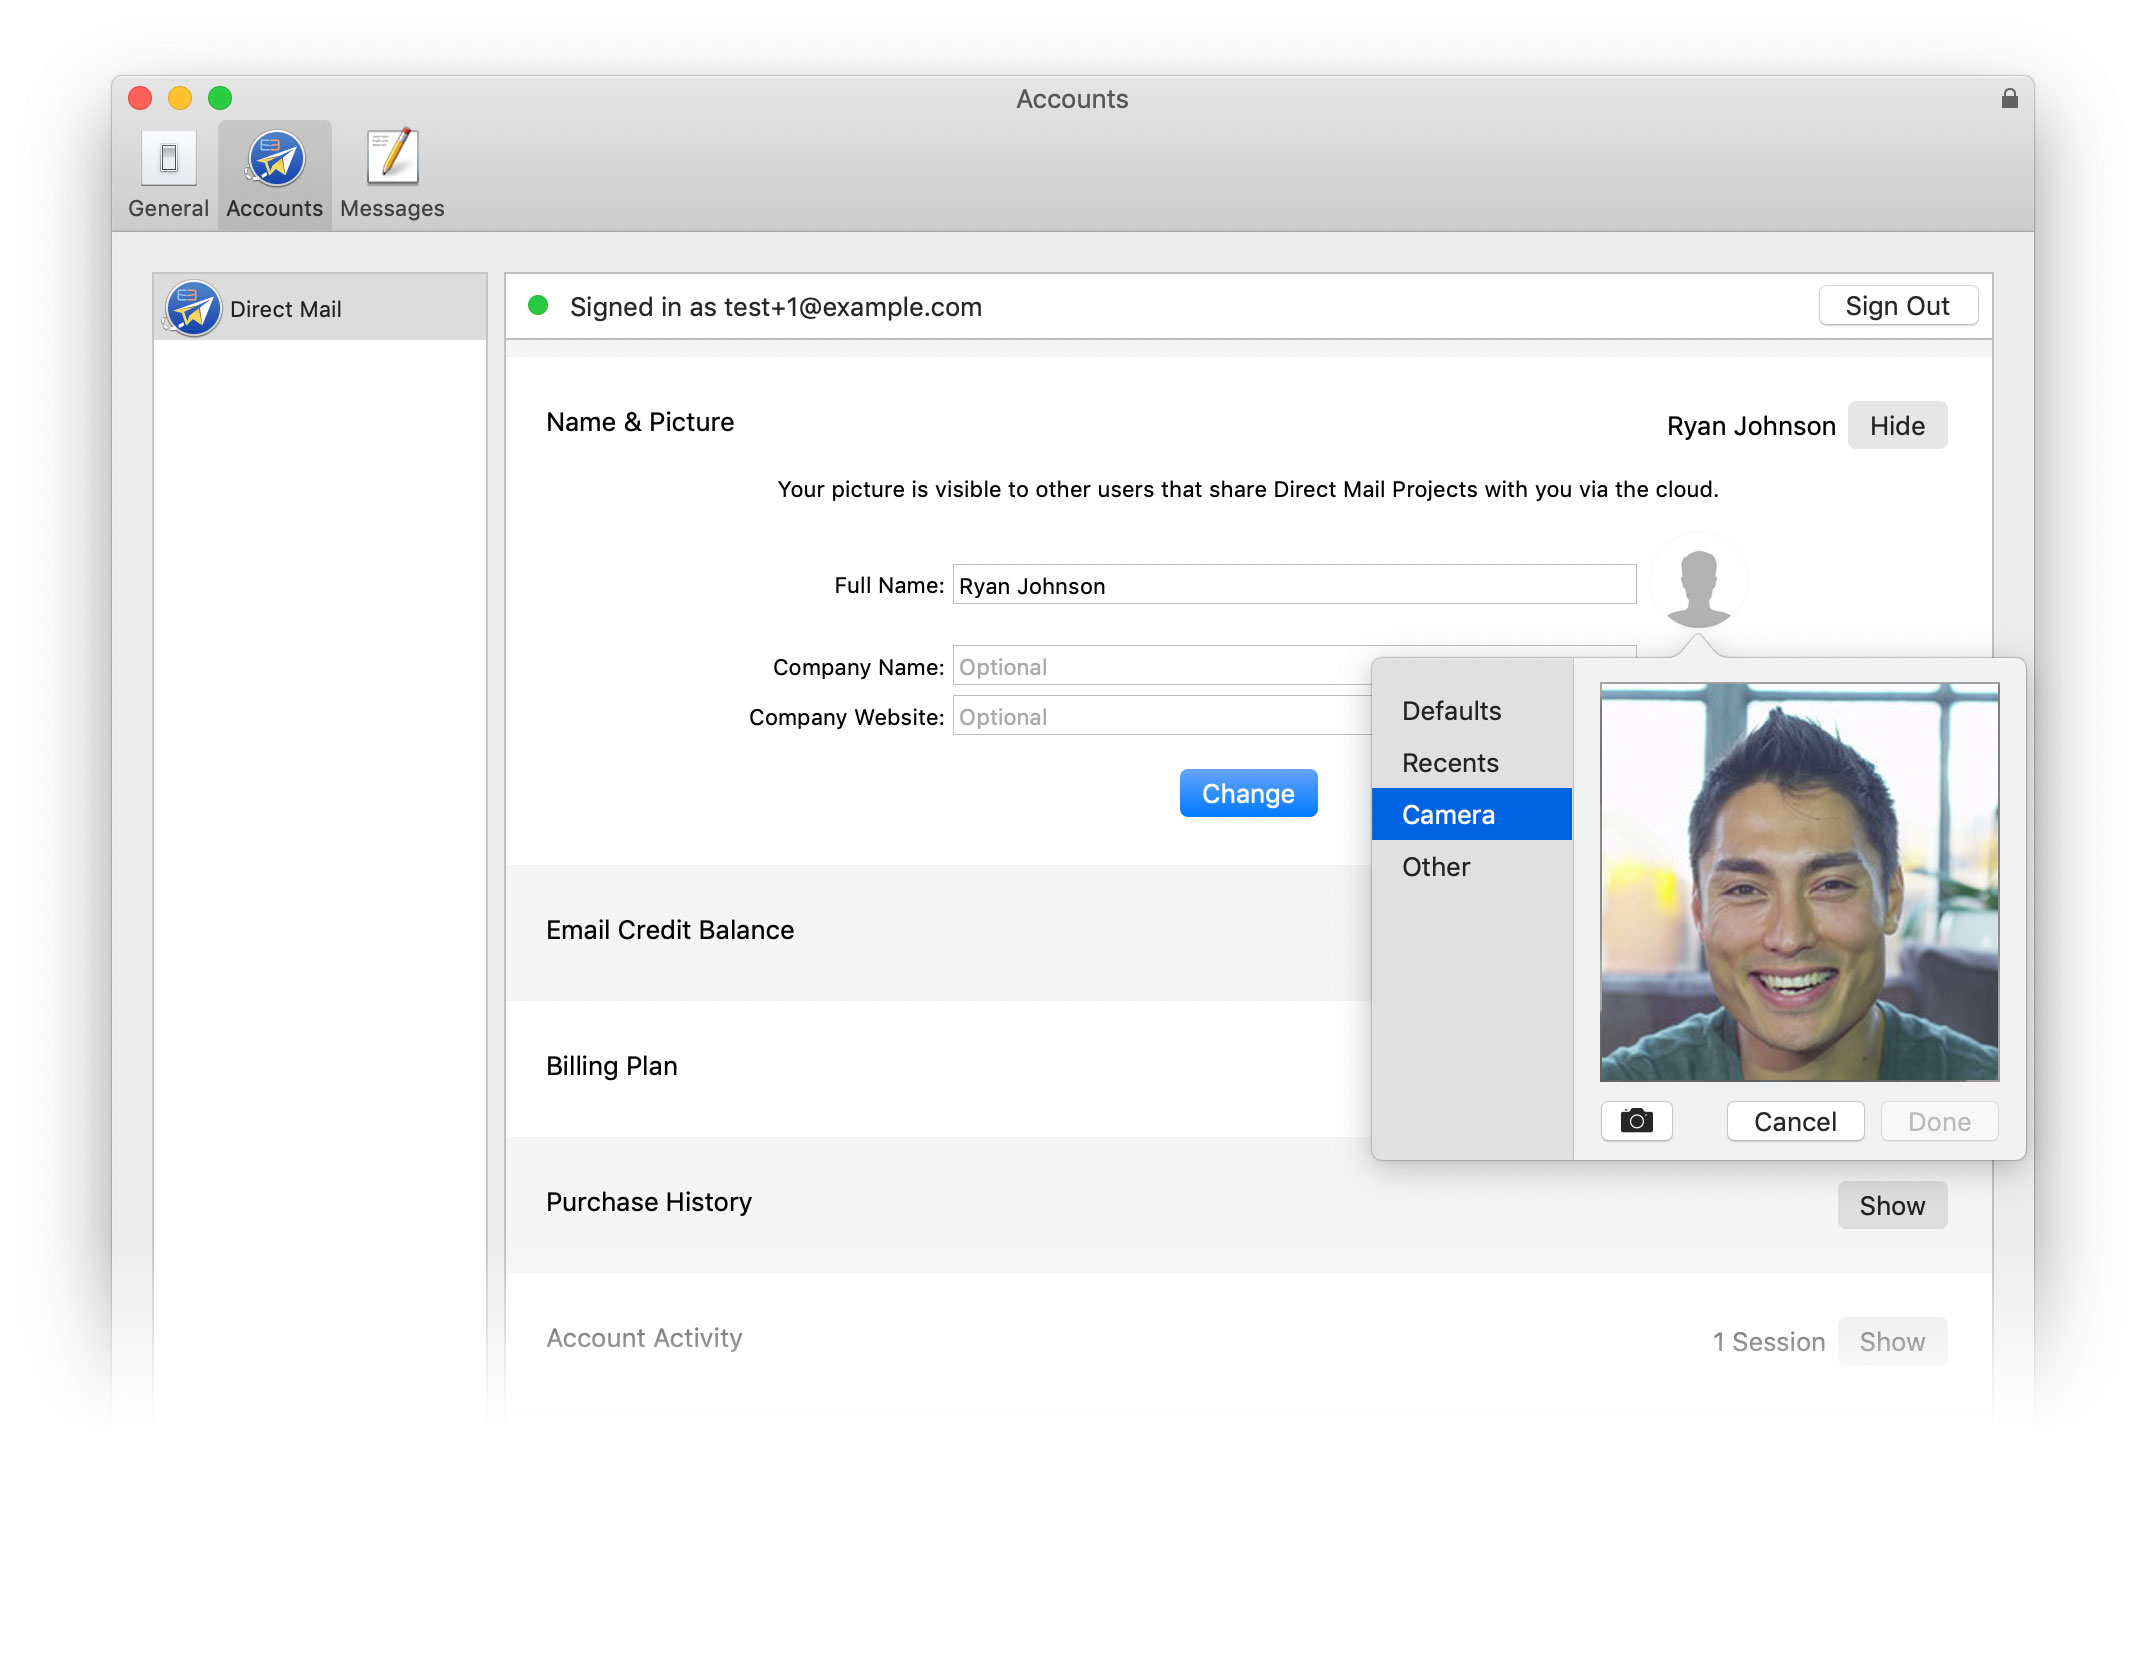
Just for fun: updating your profile photo
By default, Direct Mail shows a generic “profile photo” next to each person’s name. You can add some fun to Direct Mail by updating your profile photo. Your photo will show up in the sharing window when other people share their Direct Mail projects with you. To update your photo, choose “Direct Mail > Direct Mail Account” from the menu bar at the top of the screen, then click on “Name & Picture”.
Conclusion
Whether it’s authoring content, proofreading, or building a list, email marketing campaigns often require the talents of a whole team working together. Direct Mail’s sharing features can make it easier to work together in real time—without resorting to workarounds like Dropbox or file servers. We hope you take a look at what’s possible, and please let us know what you think.
Direct Mail’s built-in templates are engineered to look great across a variety of devices and screen sizes. Even better, Direct Mail’s built-in editor ensures that any customizations, changes, or redesigns you make continue to look their best on all devices—with no extra work required on your part. If you’re a power user, though, you might find yourself wanting to customize your subscriber’s email experience even further based on what device they use to read your email. If that’s you, check out today’s pro-tip:
Did you know that you can show different content to your subscribers based on the kind of device they are reading your email on? This can be useful for customizing the layout or design of your newsletter for large or small screens. For example, the “Dive In” template that comes with Direct Mail uses this feature to show a slightly different header when the email is viewed on a mobile device.
Here’s how to do it (you must be using one of our modern templates):
Click on the section that you want to customize
Click on the right arrow at the bottom of the pop-up window
Click on the “Visibility” pop-up menu and choose Desktop and Mobile, Desktop Only, or Mobile Only
You can use the Preview window‘s “Simulate Screen Size” feature to check out the results!
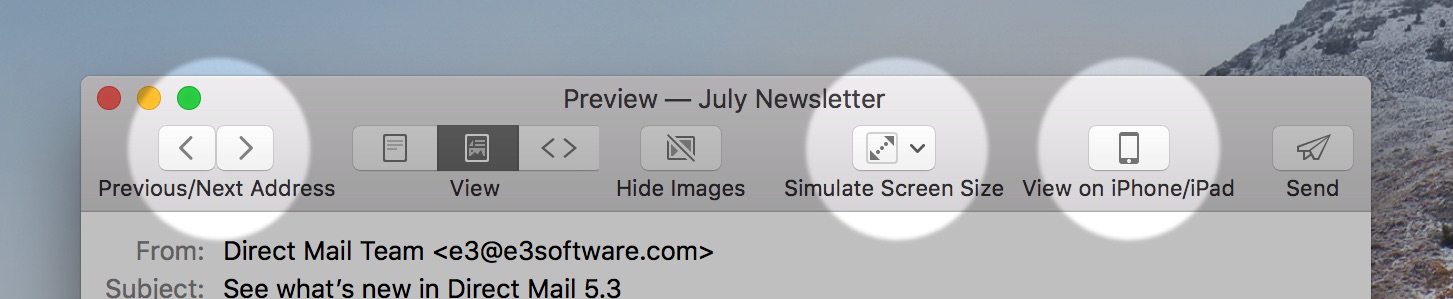
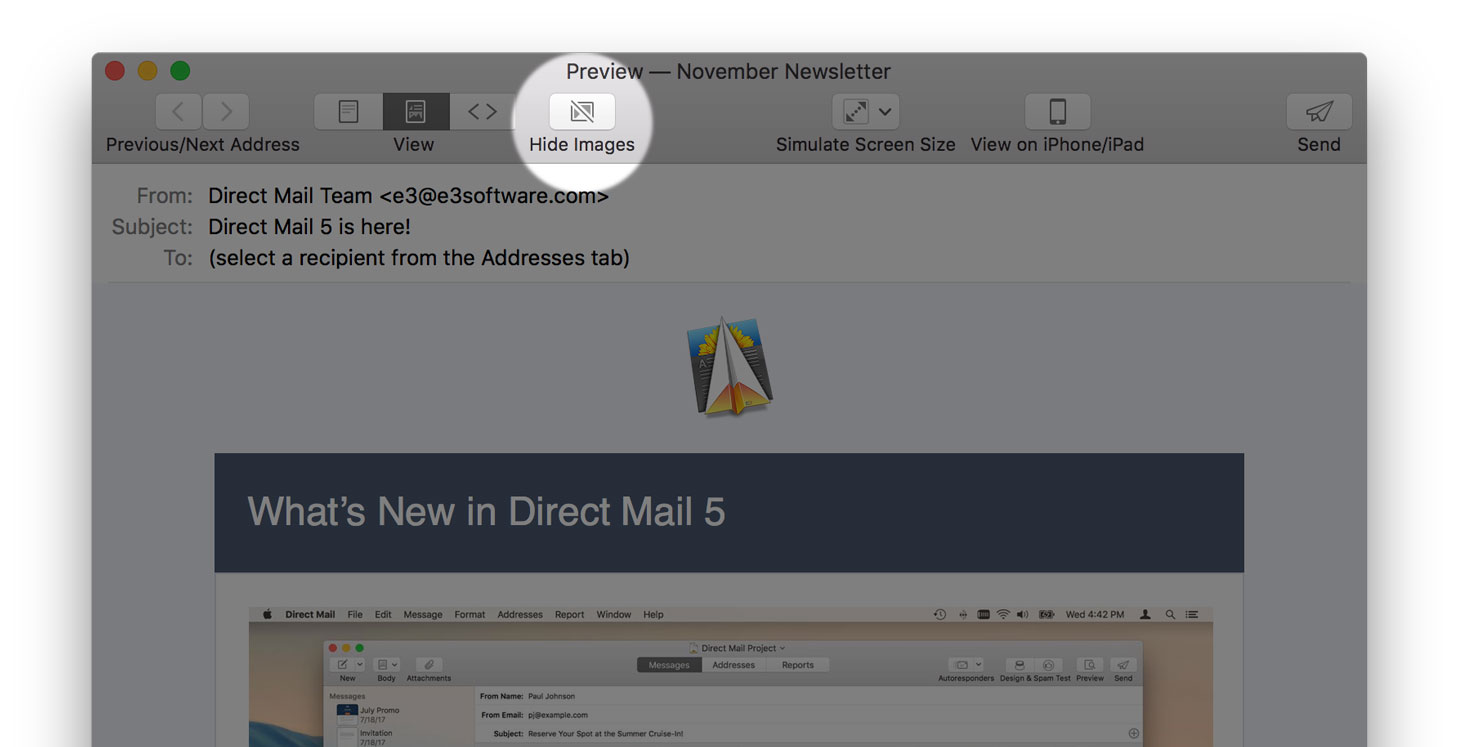
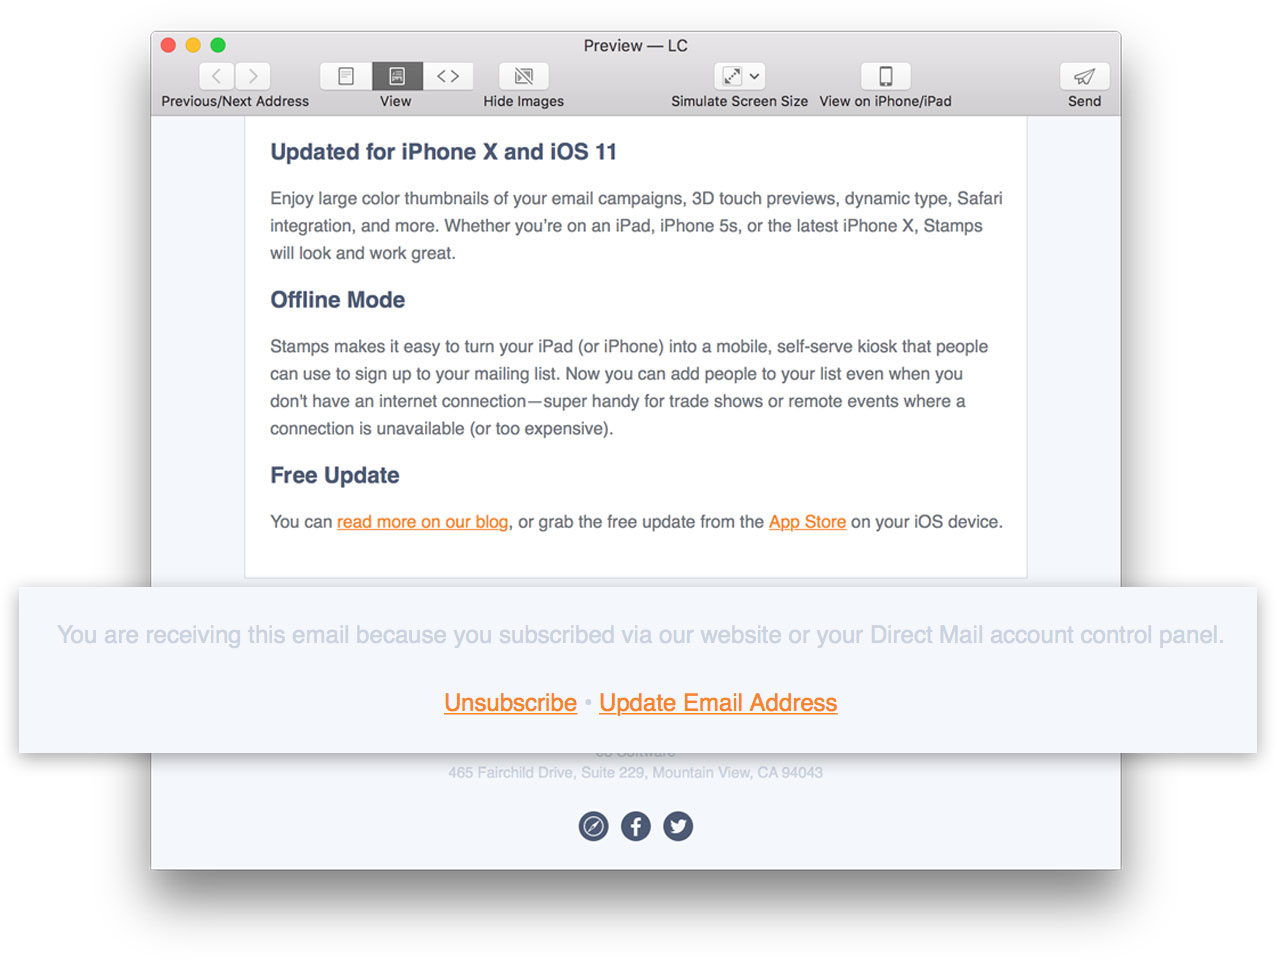
Did you know that you can use the Preview window to see what your final email will look like for each recipient? Click the Preview button in the toolbar to show the Preview window, then take a look at these three buttons:
The “Previous/Next Address” buttons step through your mailing list. If you have any mail-merge tags in your email (like “first name”) or dynamic content, the preview will show you exactly how your message will be merged for the selected recipient.
The “Simulate Screen Size” button shows you what your message looks like when it is resized down to different mobile-sized screens (including iPhone, Samsung, and iPad sizes)
The “View on iPhone/iPad” button actually sends a preview directly to the iPhone in your pocket (or iPad on your desk). You’ll need to have the Stamps app installed on your device.
If you’re like us, you’re always searching for the perfect combination of subject lines, photos, content, and more that will maximize the reach and impact of your email campaigns. These are all key considerations, but you might be missing out on some simple tweaks that will help you connect with an important subset of your mailing list: visually impaired or physically disabled subscribers. Here are some simple tips that will not only make your email accessible to them, but better for everyone, as well.
Add Image Descriptions or “Alt Text”
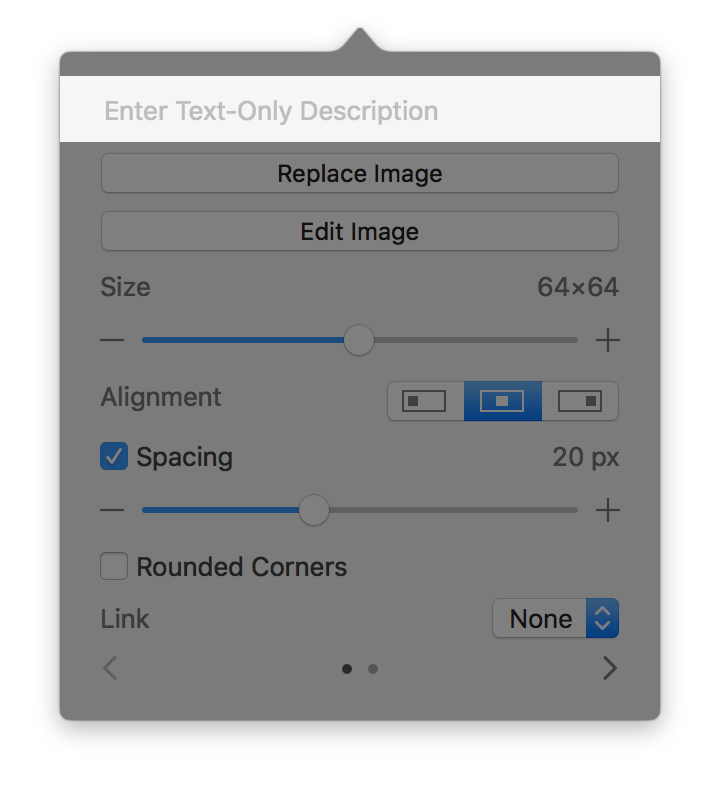
One of the easiest things you can do is make sure that each image in your email has a text-only description (also known as “alt text”). These descriptions are used in a variety of ways: screen-reading software (like VoiceOver on the Mac or iOS) can read the descriptions to the user using text-to-speech technology, email clients display the descriptions when the user has turned off image loading, and devices that don’t support HTML email (like Apple Watch) show them as part of the plain text version of your email. Adding a text-only description is easy, just click on the image and fill out the text box at the top:
You may find it useful to use the Preview window to see which images in your email are still missing descriptions. You can use the “Show/Hide Images” button in the toolbar of the Preview window to toggle images on and off:
Avoid Low Contrast Colors
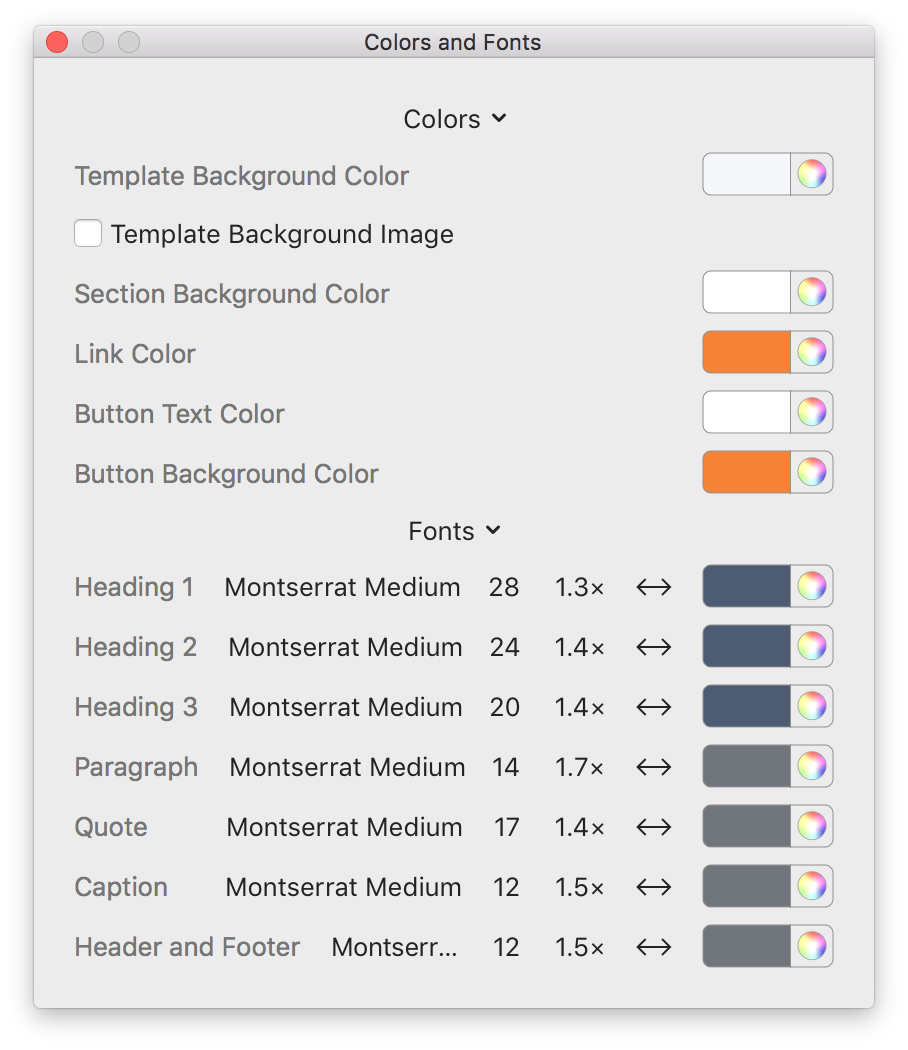
This tip is especially important for text blocks in your email. Subscribers with declining eyesight may find it difficult to read text that is placed on a low-contrast background. For example, light gray text on a white background (or dark gray text on a black background). For examples of text blocks that have sufficient contrast, take a look at the templates that come built-in to Direct Mail.
It’s easy to adjust the colors in your email. If you are using one of Direct Mail’s modern templates, just click the “Fonts & Colors” button in the message editor toolbar. If you are using a different template, select the text and click the color picker icon in the message editor toolbar.
Bump Up the Font Size
Small font sizes may be too difficult to read (even for normally sighted readers), which might dissuade subscribes from diving into your great content. Although sizes vary by font, a good rule of thumb is to go no smaller than 14pt or 16pt. This guideline is especially important when it comes to the unsubscribe link—don’t make it hard to find! It is never a good idea to make the unsubscribe link difficult to find, because you only end up angering subscribers and inviting spam complaints.
The templates that come built-in to Direct Mail include good examples of proper font sizes. You can adjust font sizes in the “Fonts & Colors” panel. Pro-tip: click on the “Fonts” popup menu to see font combinations that look great and can be applied to your email with just one click (modern templates only).
Direct Mail works great with VoiceOver!
Not only does Direct Mail make it easy to create accessible emails, it’s also a very accessible app itself. We’ve put a lot of care into making sure that Direct Mail works great with VoiceOver, Apple’s technology for assisting low vision users navigate and use apps. Every part of Direct Mail, from the message editor to campaign reports, is accessible to users of all abilities. If you know someone that could benefit from this attention to accessibility, spread the word!
Conclusion
As an email marketer, you have many different variables you can tune and tweak to get great results. These accessibility tips will help you reach an even larger chunk of your list, and will make your emails better for everyone in the process. We hope you take advantage, and pass the word along!