Features

Changes to Daylite Syncing

The just-released Direct Mail 3.5 update includes some changes to how Daylite syncing works. If you don’t use Daylite in conjunction with Direct Mail, then this blog post will probably not interest you. If you do, however, then you might be interested in what has changed.

Direct Mail now synchronizes unsubscribe information back to Daylite. Previously, if a contact was  marked as “unsubscribed” in Direct Mail, that information would not appear anywhere in Daylite. Starting in version 3.5, when a contact is marked as “unsubscribed” in Direct Mail, the corresponding contact in Daylite will be moved to a group called “Unsubscribes” the next time you sync. The “Unsubscribes” group in Daylite is created for you automatically and will appear as a sub-group of the Daylite group you sync with.

Here’s an example. Let’s say you have synced Direct Mail to the “Mailing List” group in Daylite. Here’s what your group looks like in Daylite:

The "Mailing List" group in Daylite

…and here’s what it looks like in Direct Mail:

The "Mailing List" group in Direct Mail

Now let’s say that Victor Chan unsubscribes from our list:

Victor Chan unsubscribes

The next time sync Direct Mail with Daylite, Victor Chan will be moved out of the “Mailing List” group and into the “Unsubscribes” group. Victor Chan will also disappear from your list in Direct Mail (as Victor is no longer in the “Mailing List” group that Direct Mail syncs with):

Victor Chan now appears in the "Unsubscribes" group in Daylite

A Note on Performance

If you have a large number of unsubscribes that have not been synced over to Daylite yet, you may find that the syncing process takes a long time to complete. We are working with Marketcircle to improve sync performance in future versions of Daylite.

Conclusion

We hope you find this improvement to Daylite syncing useful in your day-to-day workflow. Please let us know if you have any questions—and please let your friends know about how easy it is to use Daylite with Direct Mail!

Smarter Mail-Merge Tags

Using mail-merge tags is an easy way to personalize your message for each recipient. You can personalize your emails with information like the recipient’s name, company name, or up to 15 other fields of your choosing. However, long-time and first-time users of Direct Mail may not be aware of some of the more powerful mail-merge features that were added in Direct Mail 3. In this blog post, we’ll talk about two ways to make your emails more dynamic and more personal.

Fallback Values

Let’s start with a simple example. Here’s a mail-merge tag being used in the greeting of a message:

The "[first name]" mail-merge tag being used in a greeting
The “[first name]” mail-merge tag being used in a greeting.

But what if your mailing list doesn’t contain a first name for every recipient? That would mean that some people would see “Hello” and then just blank space where the name was supposed to go. We can use fallback values to remedy this situation. Try this instead:

Use the "fallback" feature of a mail-merge tag to provide default values when merging.
Use the “fallback” feature of a mail-merge tag to provide default values when merging.


Now regardless of whether or not you have first name data for all the recipients in your list, the results will look great. Your recipients will either see “Hello Jonathan” (if that’s what you had listed as their first name in your mailing list) or “Hello Friend” (if you didn’t have their first name in your mailing list).

This technique works with all the mail-merge tags available in Direct Mail. We recommend using the Preview window to see ahead of time what your final, merged message will look like for each recipient in your list.

Conditionals

Conditionals take mail-merge tags one step further. They allow you to use if-else logic to create messages whose content changes depending on the recipient. For example, let’s imagine that I am sending out a reminder for an upcoming event where lunch will be served. I have already collected meal preferences for everyone on my mailing list and stored them in my mailing list under the column Custom 1. Here’s how I could use conditionals to include a special paragraph in my email for only those folks that prefer vegetarian meals:

We use conditional mail-merge tags to include a paragraph only for our vegetarian subscribers.


Now only the recipients that have the word “Vegetarian” in the Custom 1 column in your mailing list will see the paragraph about the vegetarian meals. If you need even more advanced logic, you can use if/else-if logic as well as other equality operators (=, !=, >=, <=, >, and <). Please see our support article for more information.

Conditional mail-merge tags are available under the “Conditionals” section of the mail-merge tag menu. As with fallback values, we recommend using the Preview window to see what the results of your mail-merge will look like for each recipient in your list.

Conclusion

We hope the above examples have been helpful in understanding how mail-merge tag fallback values and conditionals can improve your emails. We have found that email campaigns that are personalized to the recipient tend to have far better open and click rates. For more information, please see the following two support articles:

How do I personalize my message with mail-merge tags?

How do I personalize my message with if/else logic?

Use Transparency to Make Your Logo Look Great!

Many of the templates that come with Direct Mail include a placeholder for your company logo. Like this:

Since your logo is one of the first things your recipients will see, it’s important that it looks great. Oftentimes our team sees newsletters with logos that don’t mesh well with the background color of the newsletter, like this:

See that big white box surrounding the “art” logo? I think you’ll agree that it would look better if we got rid of the white background and had the logo blend in with the background. Here’s an easy technique you can use to make your logo blend in with the background:

Step One: Open your original logo artwork file in the Preview application

Step Two: Choose Edit > Show Edit Toolbar from the menu bar, then choose “Instant Alpha” from the Selection Tools menu

Step Four: Click and drag the colors you want to make transparent (in this case, the white background).

Step Five: Press the delete key to remove the selected color

Step Six: Choose File > Export from the menu bar. Choose “PNG” as the file format and make sure the “Alpha” option is checked.

Now when you choose your newly exported PNG for the logo, you’ll see the background color of the newsletter come through:

Use this same technique on your own logo to make a great first impression on your readers! Feel free to ask any questions in the comments and we’ll answer them right away!

A Tour of New Stamps Features

The latest and greatest update to Stamps has been out a few weeks now, so we wanted to take a moment and highlight some of the great new features you can find inside. In case you don’t already know, Stamps is our companion app for iPhone that brings you your campaign reports on the go. Here’s what’s new:

Subscribe Forms on the Go

Now you can access all of your subscribe forms right from inside Stamps. They’ve been optimized to look and work great on the small screen, too:

Now it’s a cinch to sign up people for your mailing list no matter where you are!

Mobile Previews

This summer we added a great new feature to Direct Mail we call Design Tests. Design Tests show you full-size screenshots of what your email looks like in all of the top email clients (including mobile email clients). Since mobile email usage is set to surpass desktop email usage by the end of the year, we wanted to make designing for mobile even easier. Now you can instantly send previews of your message straight from Direct Mail to your iPhone. Here’s how it works:

Just click the “Preview on iPhone” button in the Preview window and you’re message will instantly appear on your iPhone.

Delivery Notifications

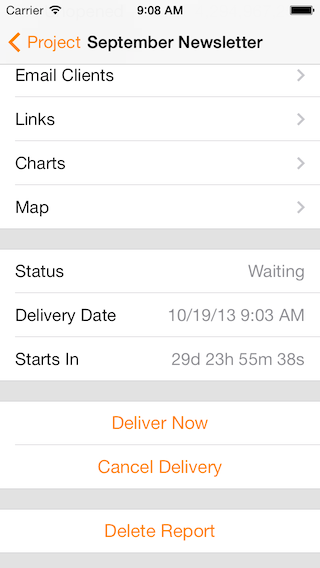
If you schedule a delivery to send at a later date, it’s nice to know when your emails have actually been sent. Now you can (optionally) receive a notification on your phone when your delivery completes:

Improved Layout

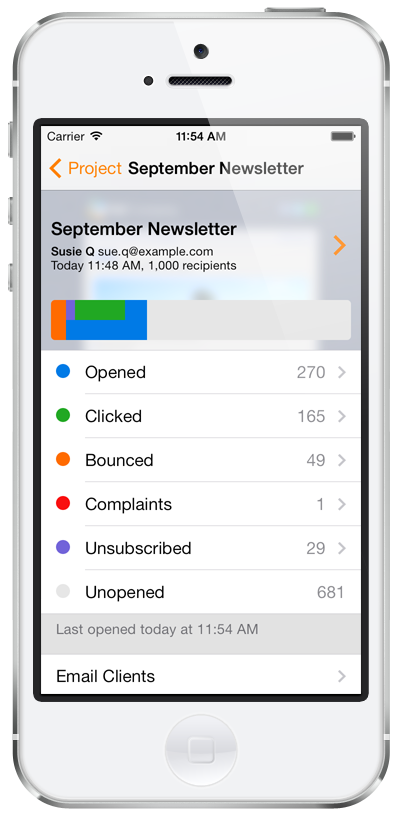
We’ve reworked the layout of the history report screen in Stamps to show you more information and a larger thumbnail of your email. Tap on the thumbnail to expand the image, or tap on the arrow to view the web version of your message.

We hope you like these improvements to Stamps. Please let us know what you think in the comments (or on our support page), and stay tuned for more enhancements in the coming weeks!

New: Share Your Campaign on Facebook!

Those of you who have upgraded to the latest version of OS X (released yesterday) may have noticed that your copy of Direct Mail just gained a new feature overnight, totally for free! Now you can share your email campaigns to Facebook without ever leaving Direct Mail!

Share your email campaigns to Facebook by clicking the Share Message button in the toolbar

To enable this feature, make sure you’re running the latest version of Direct Mail, and OS X 10.8.2 or newer. You’ll need to sign in to your Facebook account by choosing  > System Preferences > Mail, Contacts, & Calendars, and then following the on-screen instructions.

To share, head back to the Direct Mail app and click the Share Message button in the toolbar (make sure you’ve selected the sent email campaign you want to share). You can add a brief message, select the friends you want to share it with, then click Post. That’s it!

Add a comment and click Post to share your campaign

We love this easy integration with Facebook. Try sharing your next email campaign on Facebook to broaden the reach of your newsletter, promotion, or announcement. As always, let us know what you think in the comments!

Page 6 of 8